
This post will take a deep dive into identifying and maintaining pushers- how to install gaskets and straighten bent ones. We will also look at differentiating between aftermarket and original Seiko pushers. Finally, an observation of a curious change in the internal design of the later years compared with those from the initial ‘PROOF’ years will also be showcased. There is an index below to help navigate this post.
The pusher or ‘BUTTON’, to use the official Seiko terminology, is the immediate visual identifier for any chronograph and looking at the sheer variety of the 6138 and 6139 models, it is inevitable that the buttons too would be manufactured in an assortment of specifications and finishes to suit the cases they would be planted in. In total, I have been able to identify EIGHT different buttons that cover the thirty or so chronographs from the 6138/6139 stable; seven basic steel buttons and the eighth being one of them Gold Plated.
- Part I – Identification & Part Numbers of Buttons
- Part II – Gasket Installation & Straightening Bent Pushers
- Part III – Aftermarket & Original Buttons – The Differences
- Part IV – Buttons From the ‘PROOF’ years compared with the later years
Part I – Identification & Part Numbers of Buttons
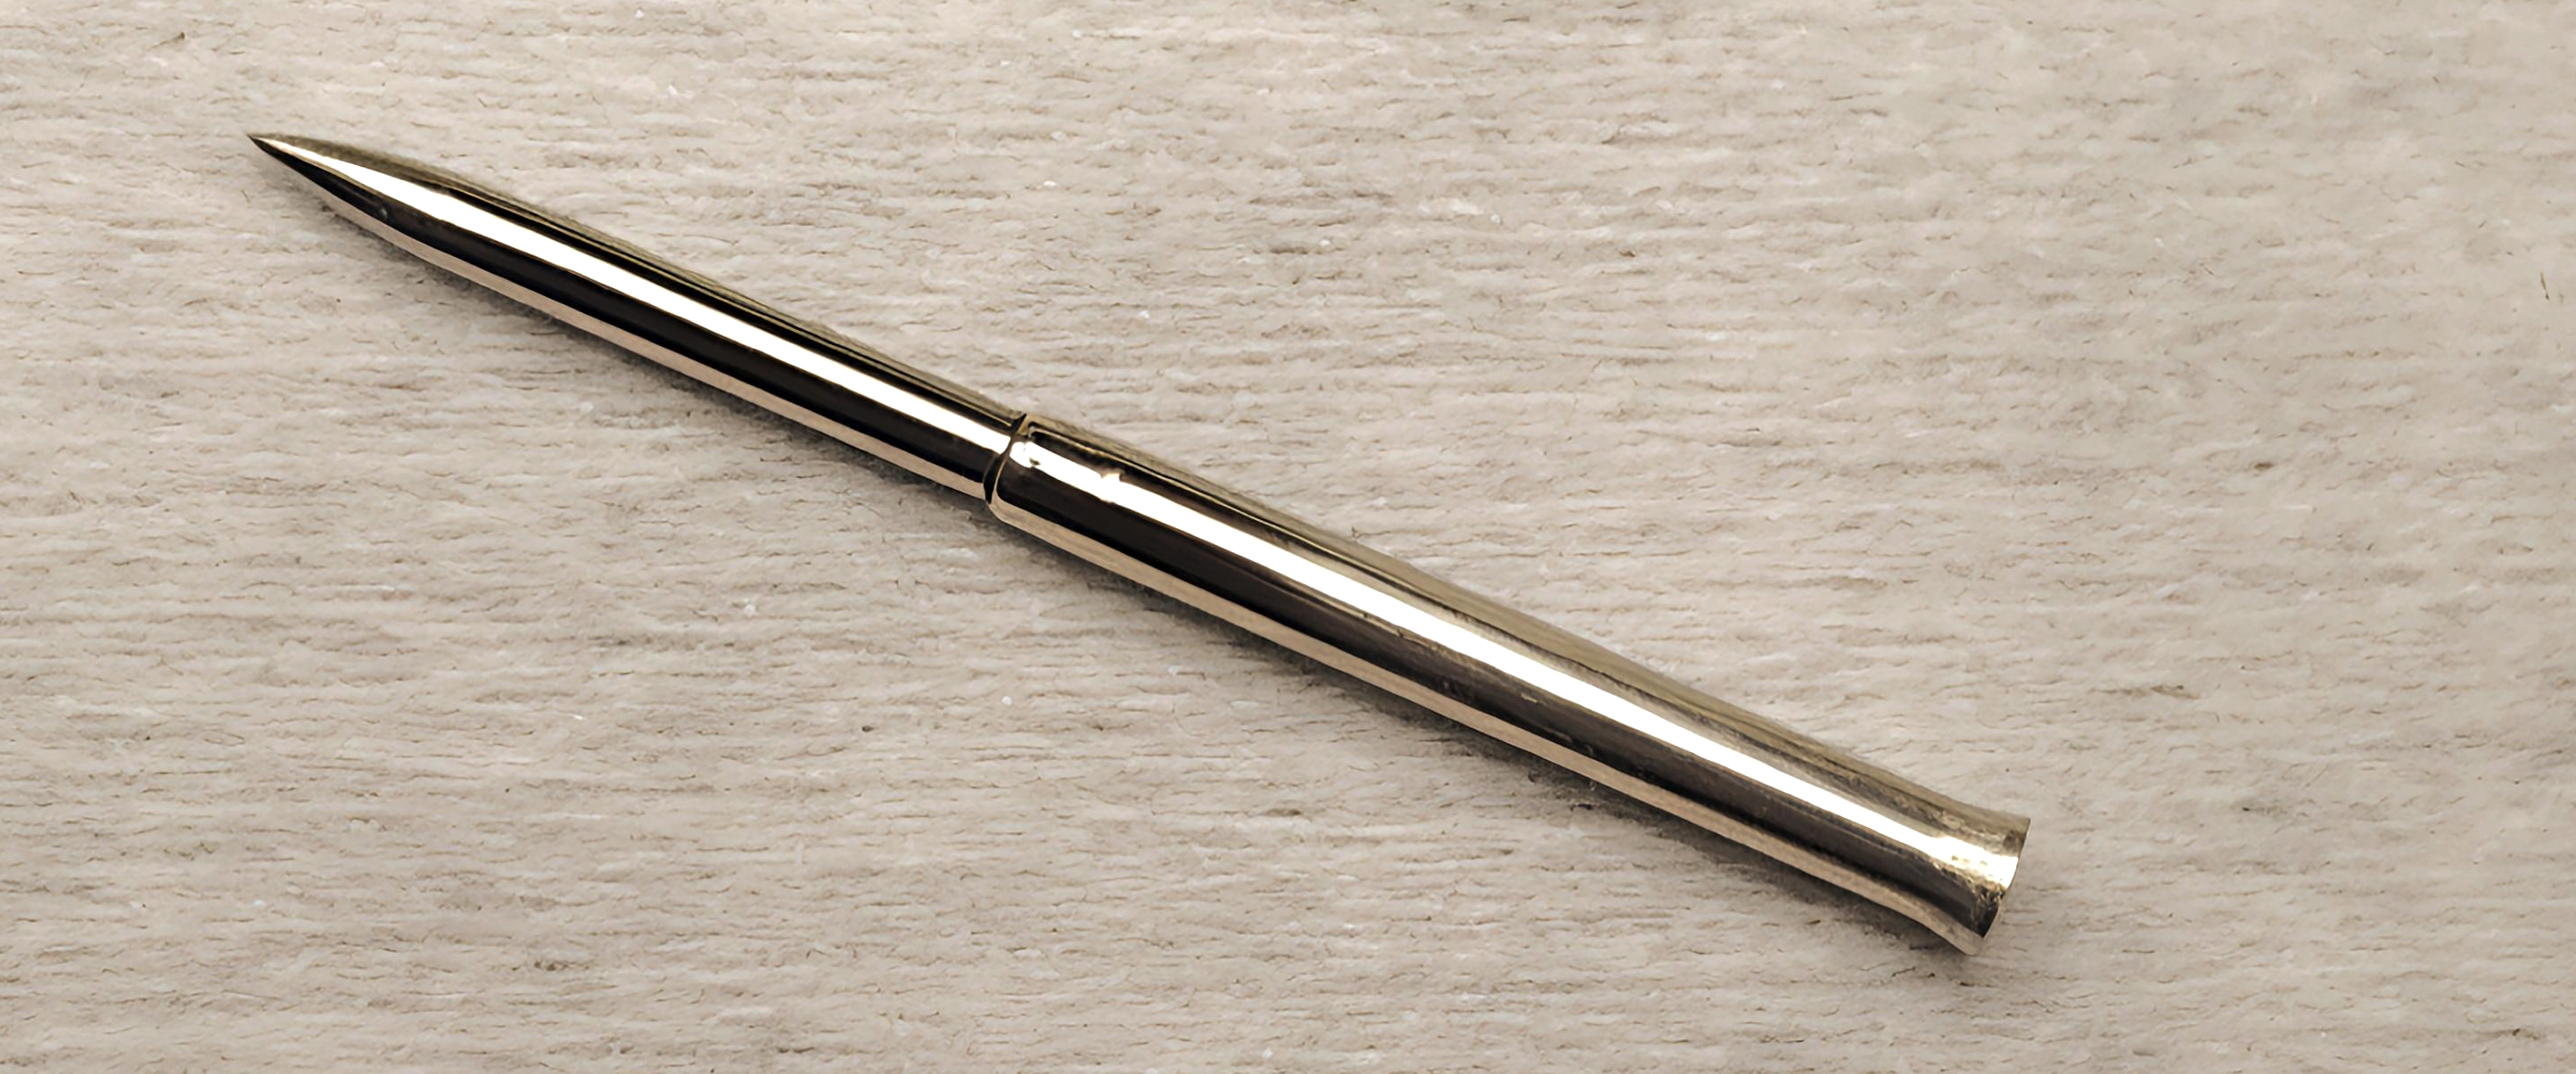
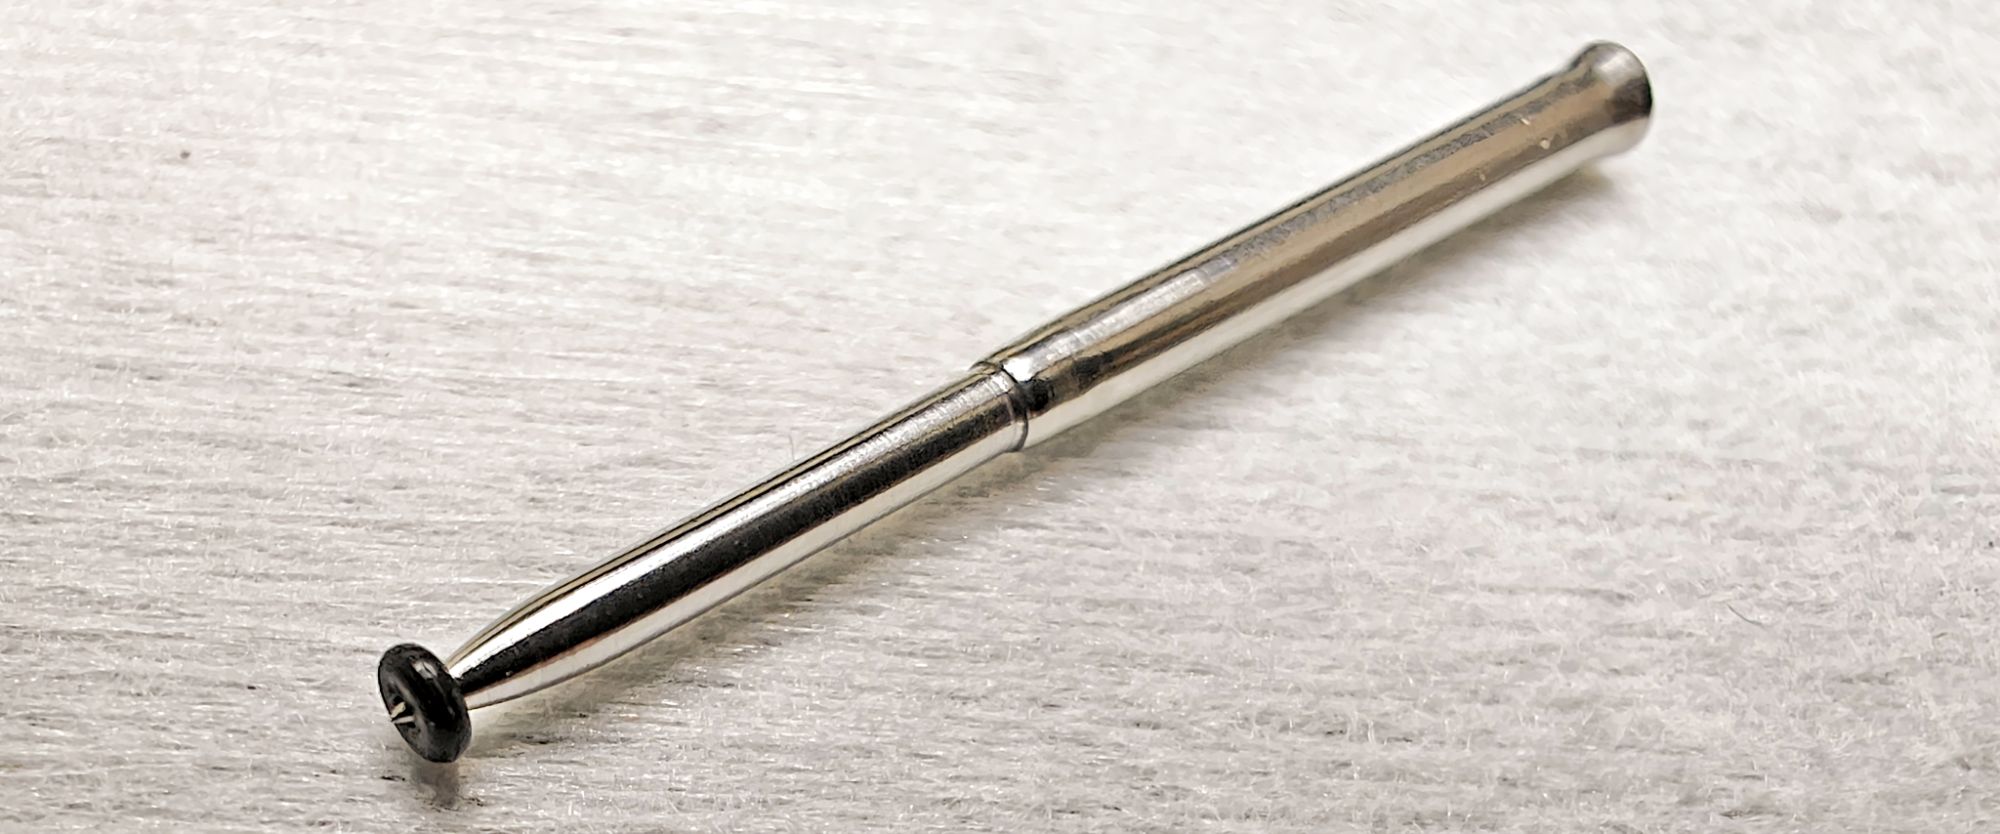
In order to structure this effectively, it would help to mark the salient measurements with which identifying the pushers become convenient. These are:
> the overall length of the pushers marked with the letter ‘A’; and
> the length of the top part of the pusher marked with the letter ‘B’, depicted below.

The table below matches the Seiko Case Number and their nicknames with the button part number and its dimensions – ‘A’ & ‘B’ as well as my notes. There is some variation in the measurements which probably is partly due to manufacturing tolerances and partly due to deformation over the years.
Images are in a slideshow below.
| Case No. | Nickname | Seiko Part Number | Overall Length ‘ A ‘ | Push-Part Length ‘B’ | Other information |
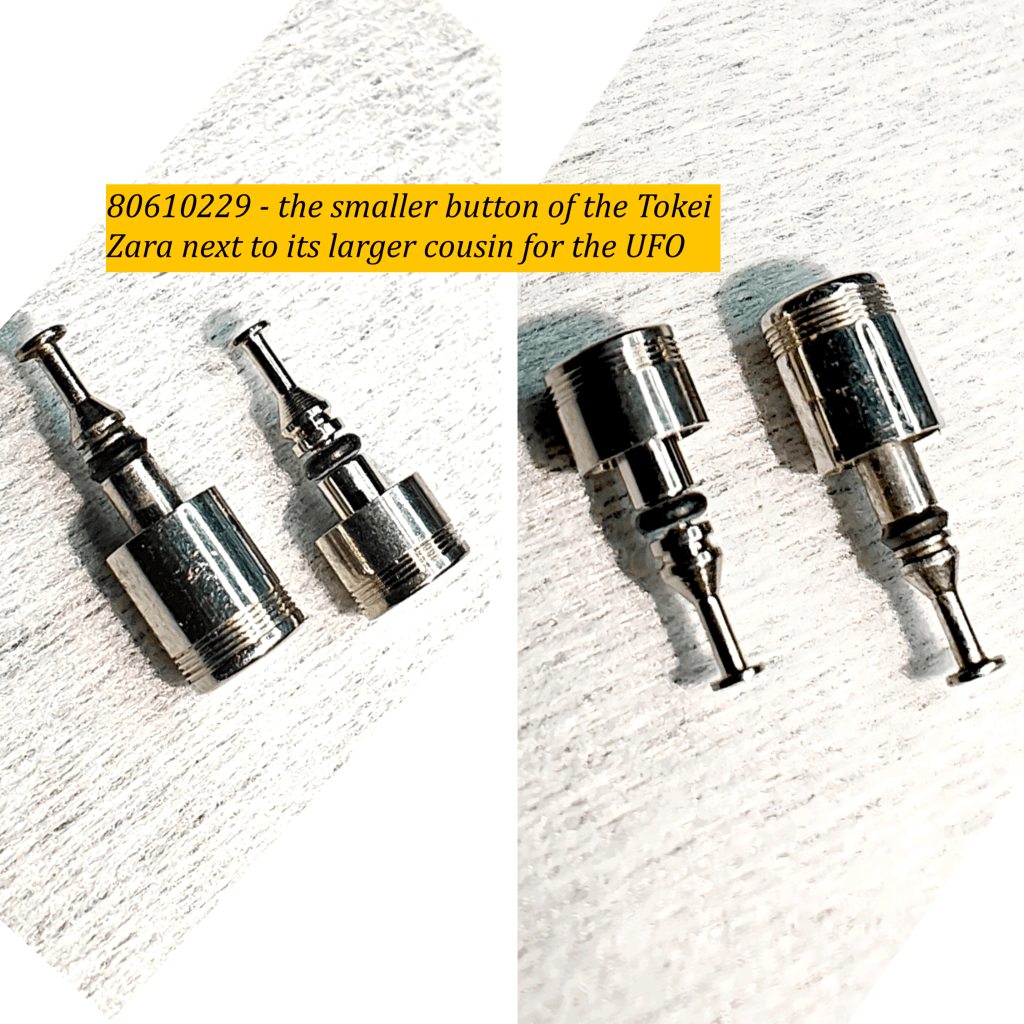
| 6138-001x | UFO or Yachtsman | 80610209 | 11.70 – 11.80mm | 5.10mm | ‘Piston Ring’ design Shared with 6138-7000 |
| 6138-0020 | Tokei Zara | 80610229 | 9.90mm | 3.10mm | ‘Piston Ring’ design Unique to this case |
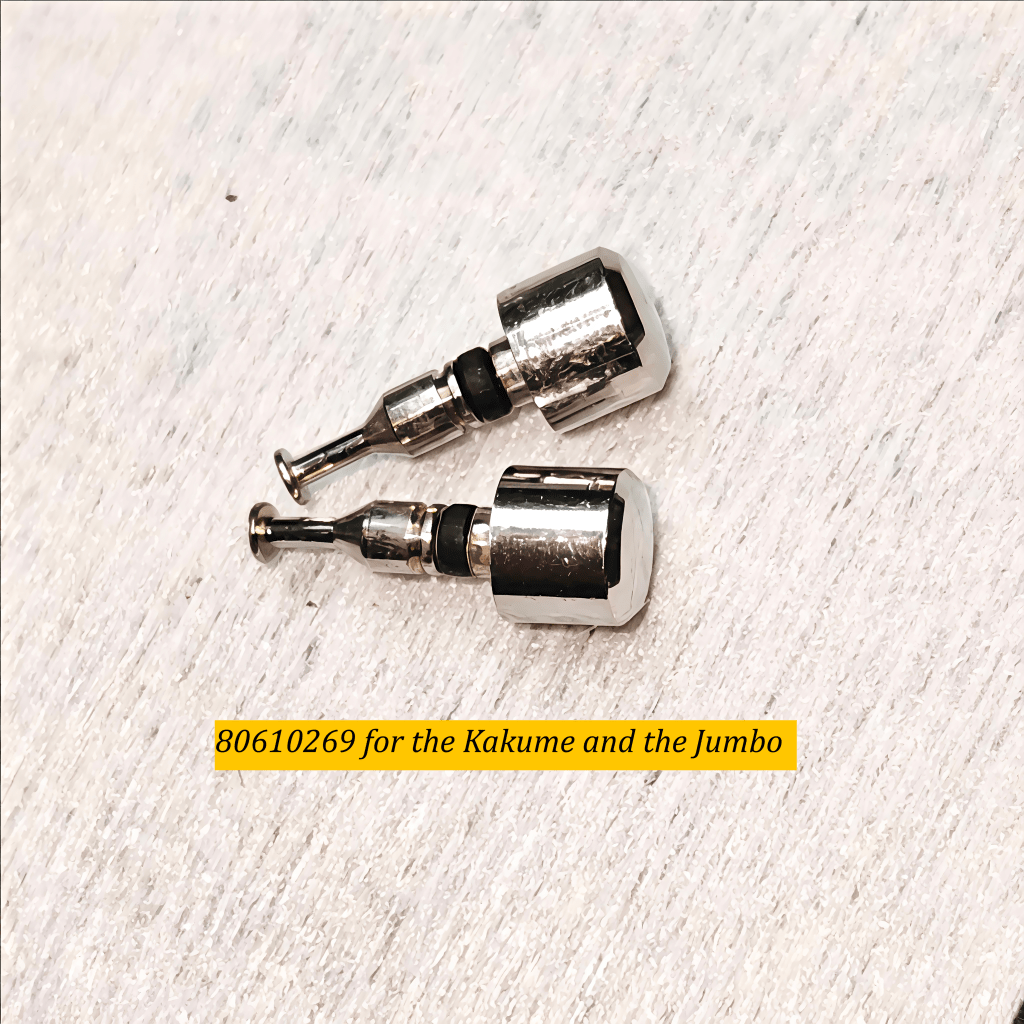
| 6138-0030 | Kakume | 80610269 | 10.50 – 10.60mm | 3.40mm | Shared with 6138-300x |
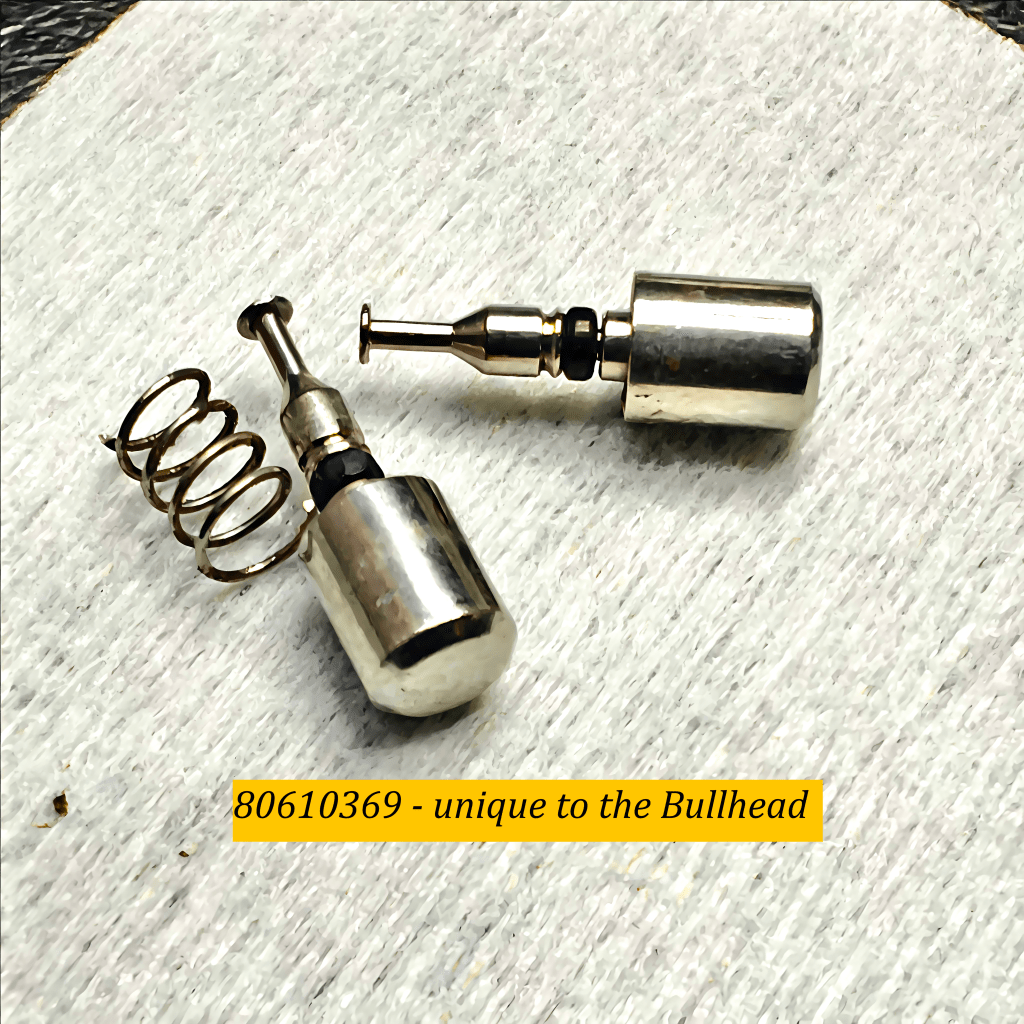
| 6138-004x | Bullhead | 80610369 | 11.90 – 12.00mm | 4.90 – 5.00mm | Longest button variant Unique to this case |
| 6138-300x | Jumbo | 80610269 | 10.50 – 10.60mm | 3.40mm | Shared with 6138-0030 |
| 6138-7000 | Slide Rule | 80610209 | 11.70 – 11.80mm | 5.10mm | ‘Piston Ring’ design Shared with 6138-001x |
| 6138-800x | Baby Panda | 80610169 | 9.70 – 9.90mm | 4.00mm | Common in many 6138 and 6139 cases |
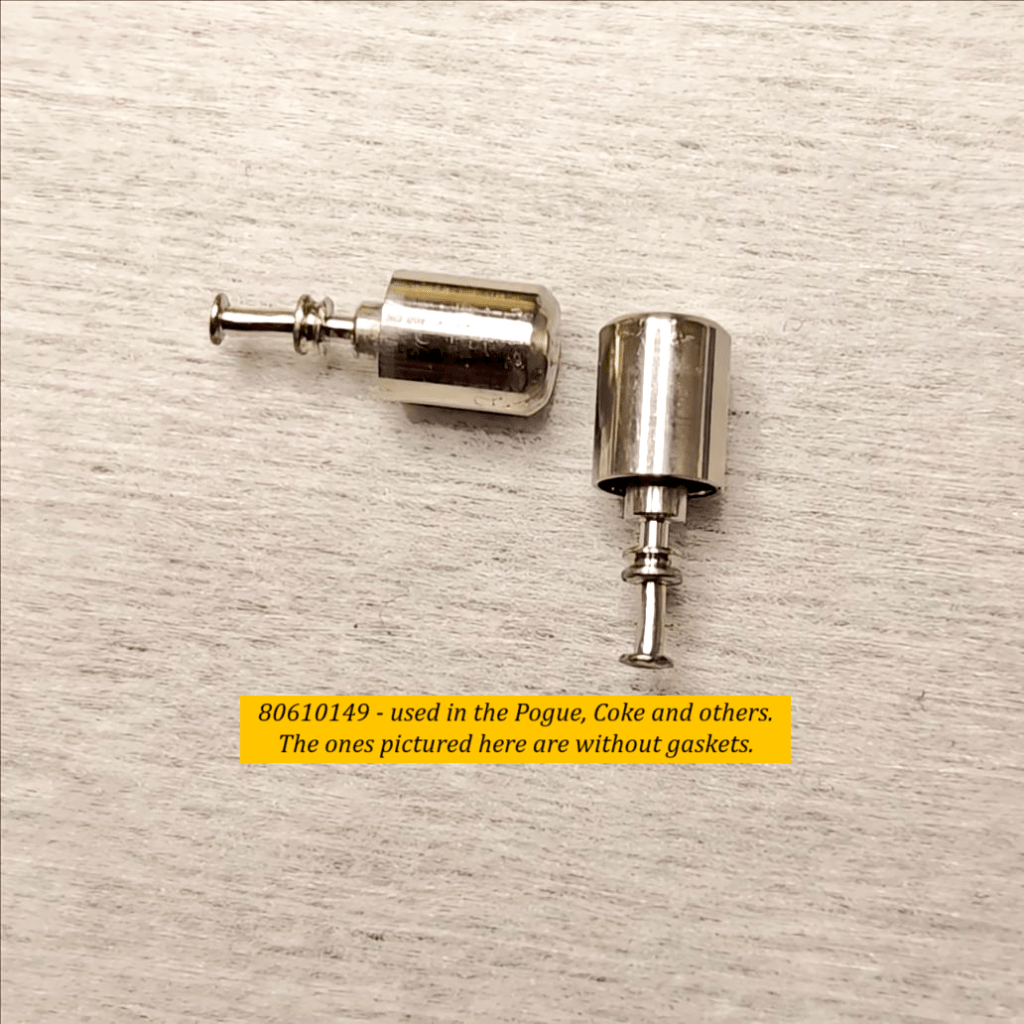
| 6138-8010 | Holy Grail | 80610149 | 10.70 – 10.80mm | 5.00mm | Used in the Pogue and other cases |
| 6138-8020 | Panda | 80610169 for Steel 80610141 for G.P. | 9.70 – 9.90mm | 4.00mm | The only gold plated pusher |
| 6138-803x | JPS – John Player Special | 80610169 for Steel 80610141 for G.P. | 9.70 – 9.90mm | 4.00mm | Same as Panda and other cases |
| — | — | — | — | — | — |
| 6139-600x | Pogue and Cevert | 80610149 | 10.70 – 10.80mm | 5.00mm | Used in many models |
| 6139-601x | Bruce Lee | 80610169 | 9.70 – 9.90mm | 4.00mm | 80610141 for gold plated |
| 6139-602x | Pulsations | 80610149 | 10.70 – 10.80mm | 5.00mm | |
| 6139-603x | Coke | 80610149 | 10.70 – 10.80mm | 5.00mm | |
| 6139-604x | Ghost | 80610169 | 9.70 – 9.90mm | 4.00mm | |
| 6139-700x | Decimeter Scale | 80610149 | 10.70 – 10.80mm | 5.00mm | |
| 6139-701x | Military | 80610149 | 10.70 – 10.80mm | 5.00mm | |
| 6139-702x | Flying Saucer | 80610149 | 10.70 – 10.80mm | 5.00mm | |
| 6139-703x | Baby Jumbo | 80610169 | 9.70 – 9.90mm | 4.00mm | |
| 6139-705x | JDM Sandwich Dial | 80610169 | 9.70 – 9.90mm | 4.00mm | |
| 6139-706x | Sunrise | 80610169 | 9.70 – 9.90mm | 4.00mm | |
| 6139-707x | Baby Jumbo | 80610169 | 9.70 – 9.90mm | 4.00mm | |
| 6139-708x | Hexagon | 80610169 | 9.70 – 9.90mm | 4.00mm | |
| 6139-710x | Helmet/Darth Vader | 80610169 | 9.70 – 9.90mm | 4.00mm | |
| 6139-800x | Barrel | 80610169 | 9.70 – 9.90mm | 4.00mm | |
| 6139-801x | Black PVD | 80610169 | 9.70 – 9.90mm | 4.00mm | |
| 6139-802x | Retro Racer | 80610169 | 9.70 – 9.90mm | 4.00mm | |
| 6139-803x | — | 80610169 | 9.70 – 9.90mm | 4.00mm | |
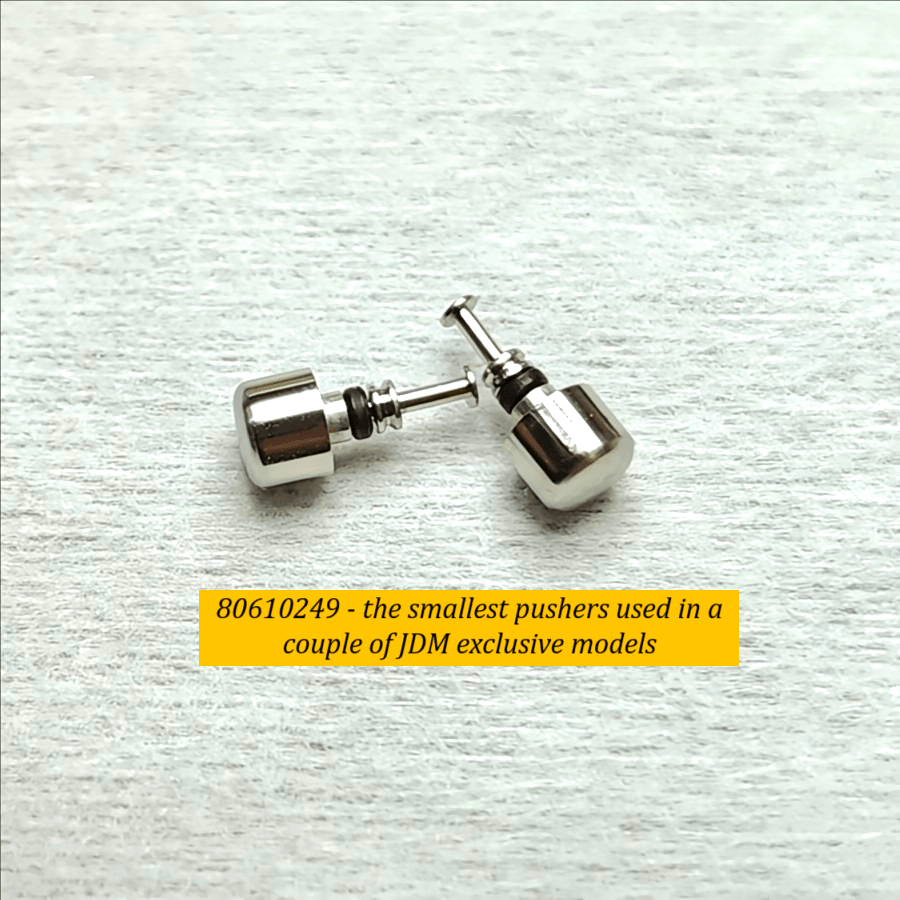
| 6139-804x | — | 80610249 | 8.70mm | 3.00mm | shortest pushers |
| 6139-805x | — | 80610249 | 8.70mm | 3.00mm | shortest pushers |
| — | — | — | — | — | — |


Part II – Gasket Installation & Straightening Bent Pushers
All the buttons use the same gasket number DJ0060B which has a ‘D’ shaped profile. The inner surface of the gasket that is in contact with the pusher is flat while the outer side which is in contact with the case tube is rounded. Old gaskets will almost always be deteriorated to the point where replacement is absolutely essential to protect the movement, dial and hands from moisture damage. DJ0060B gasket reproductions are in plentiful supply online.
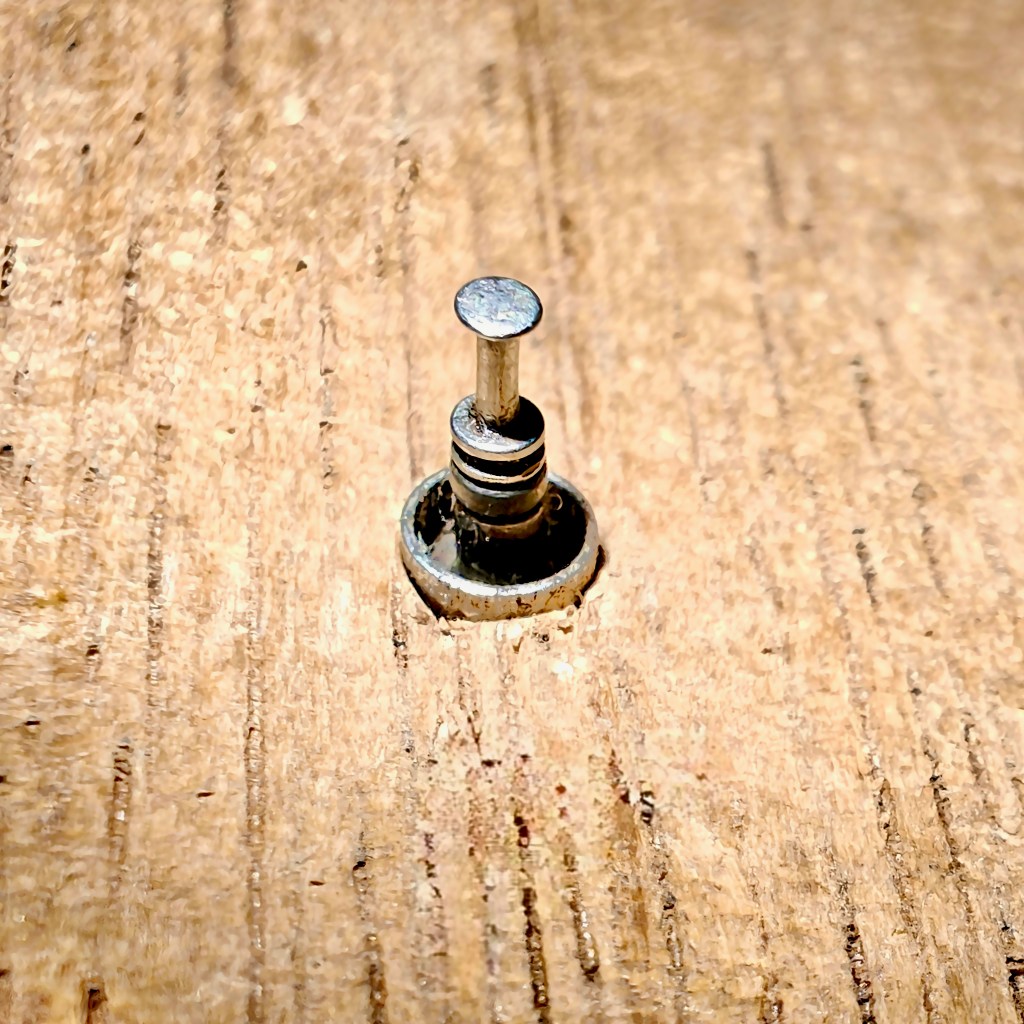
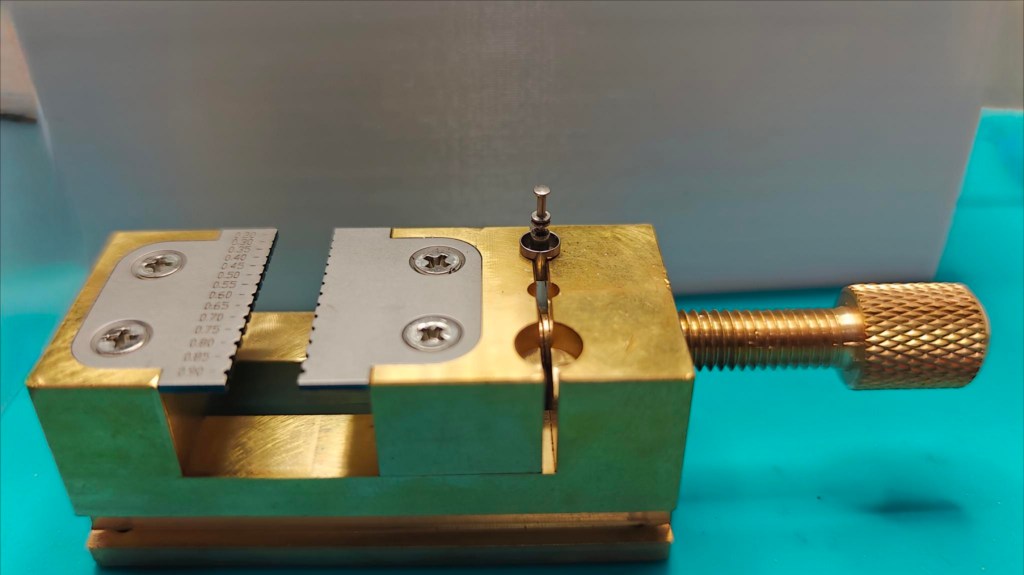
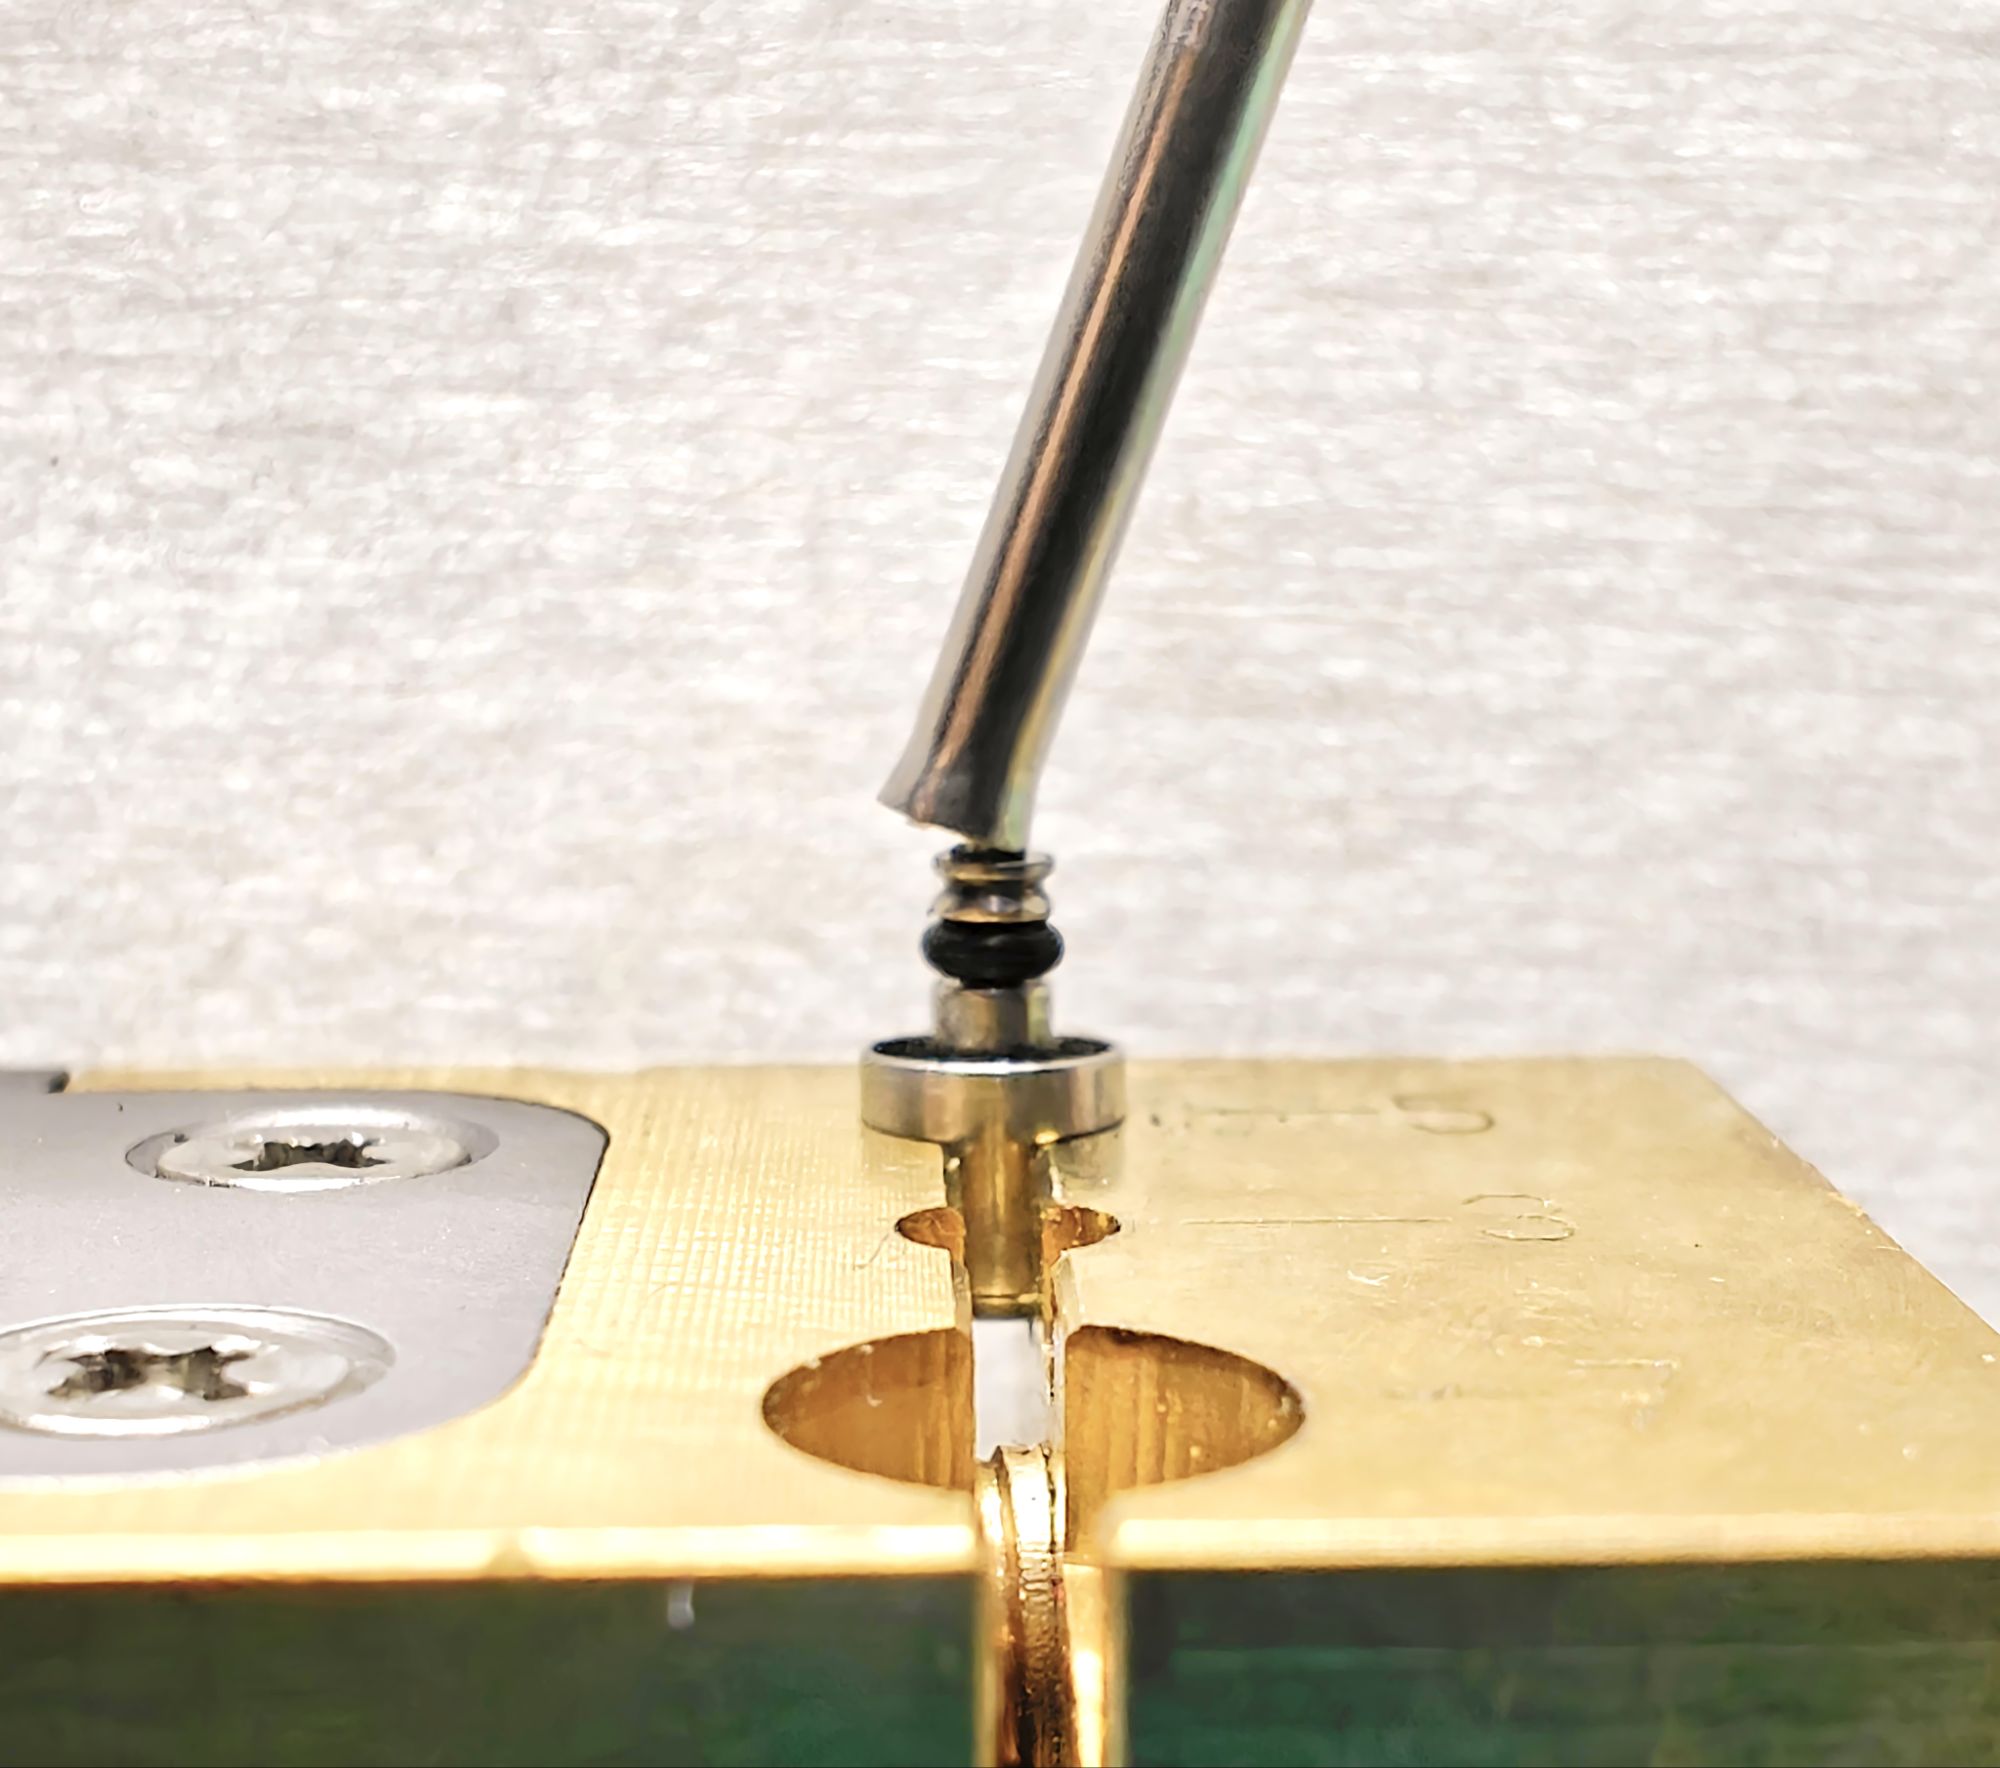
Any sort of maintenance work will be much easier if the button is held securely. This can be achieved in either of two ways – a 4.00mm hole drilled in a piece of hardwood can be used to hold the button or a dedicated inexpensive tool can be used.
Installing the gaskets is a fussy job to say the least- the tiny rubber rings, when stretched, easily fly away at the slightest mishandling. In order to affix the gasket to the correct groove in the button, a home-made tool will make life much easier. For that one would need two things: a 2.0mm thick spring bar; and a 1.6-1.8mm round metal bar- an old screwdriver blade, a steel nail or a knitting needle are good candidates. Next :-
- Pull out the ends of the spring bar- only the tube is needed.
- One end of this tube has to be flared out so that it can slide over the ring BELOW which is the groove where the gasket has to be slid into. This can be done with a staking tool, a drill bit or any appropriate alternative.
- Shape the nail or screwdriver blade to have a smooth pointed tip either with a powered rotary tool like a Dremel or by hand.

Finally superglue the pointed piece into the tube at the end opposite the flare. It should look like this: A pointed tip at one end and a flared hollow tube at the other.
To fit the gasket, first spear the gasket onto the gaskettool™ which has been lightly lubricated with silicone grease as shown in my LUBRICATING GUIDE. Slide the gasket down with the help of tweezers right into the gasket groove.
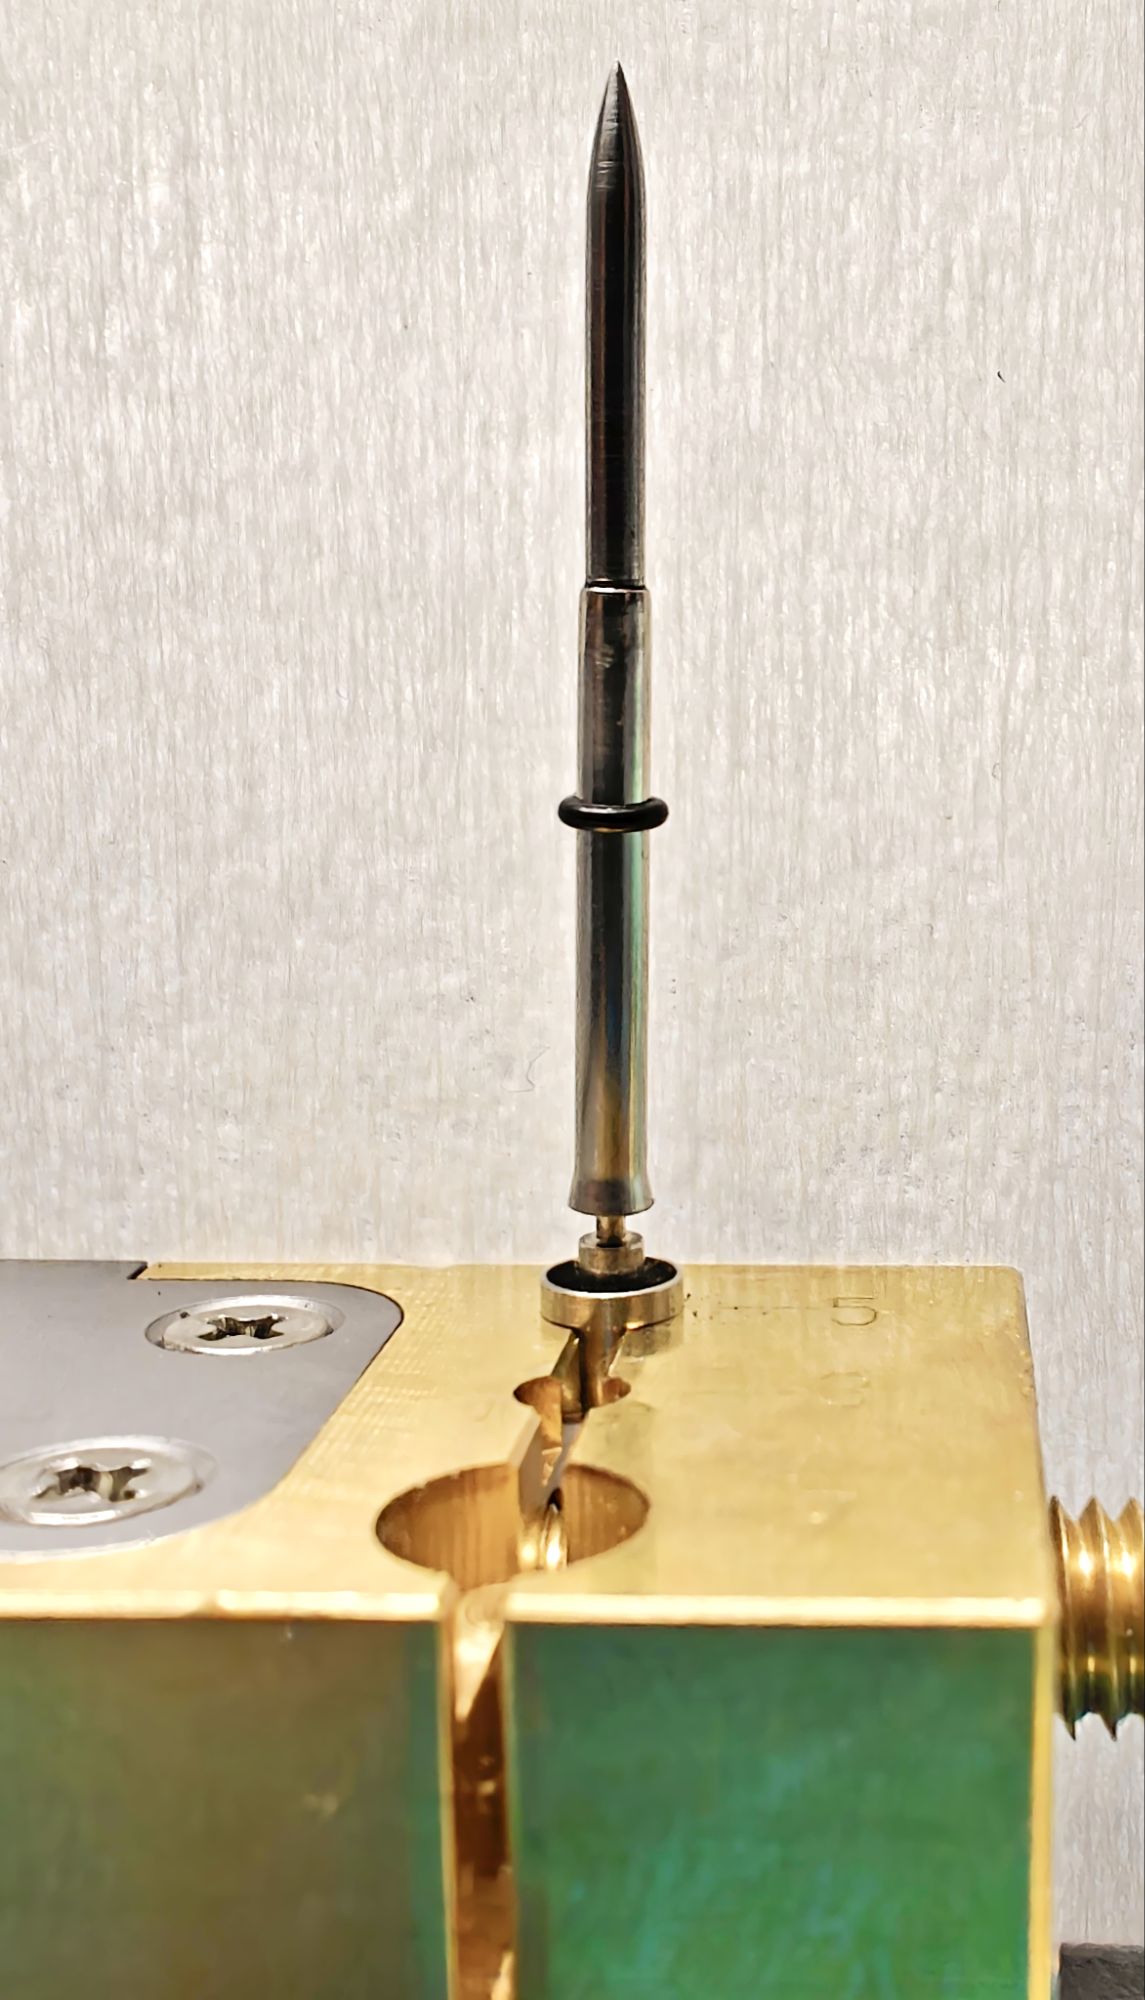
Straightening bent pushers is a simple affair. After securing the button as described above, simply use a piece of thick pegwood and push gently where needed.
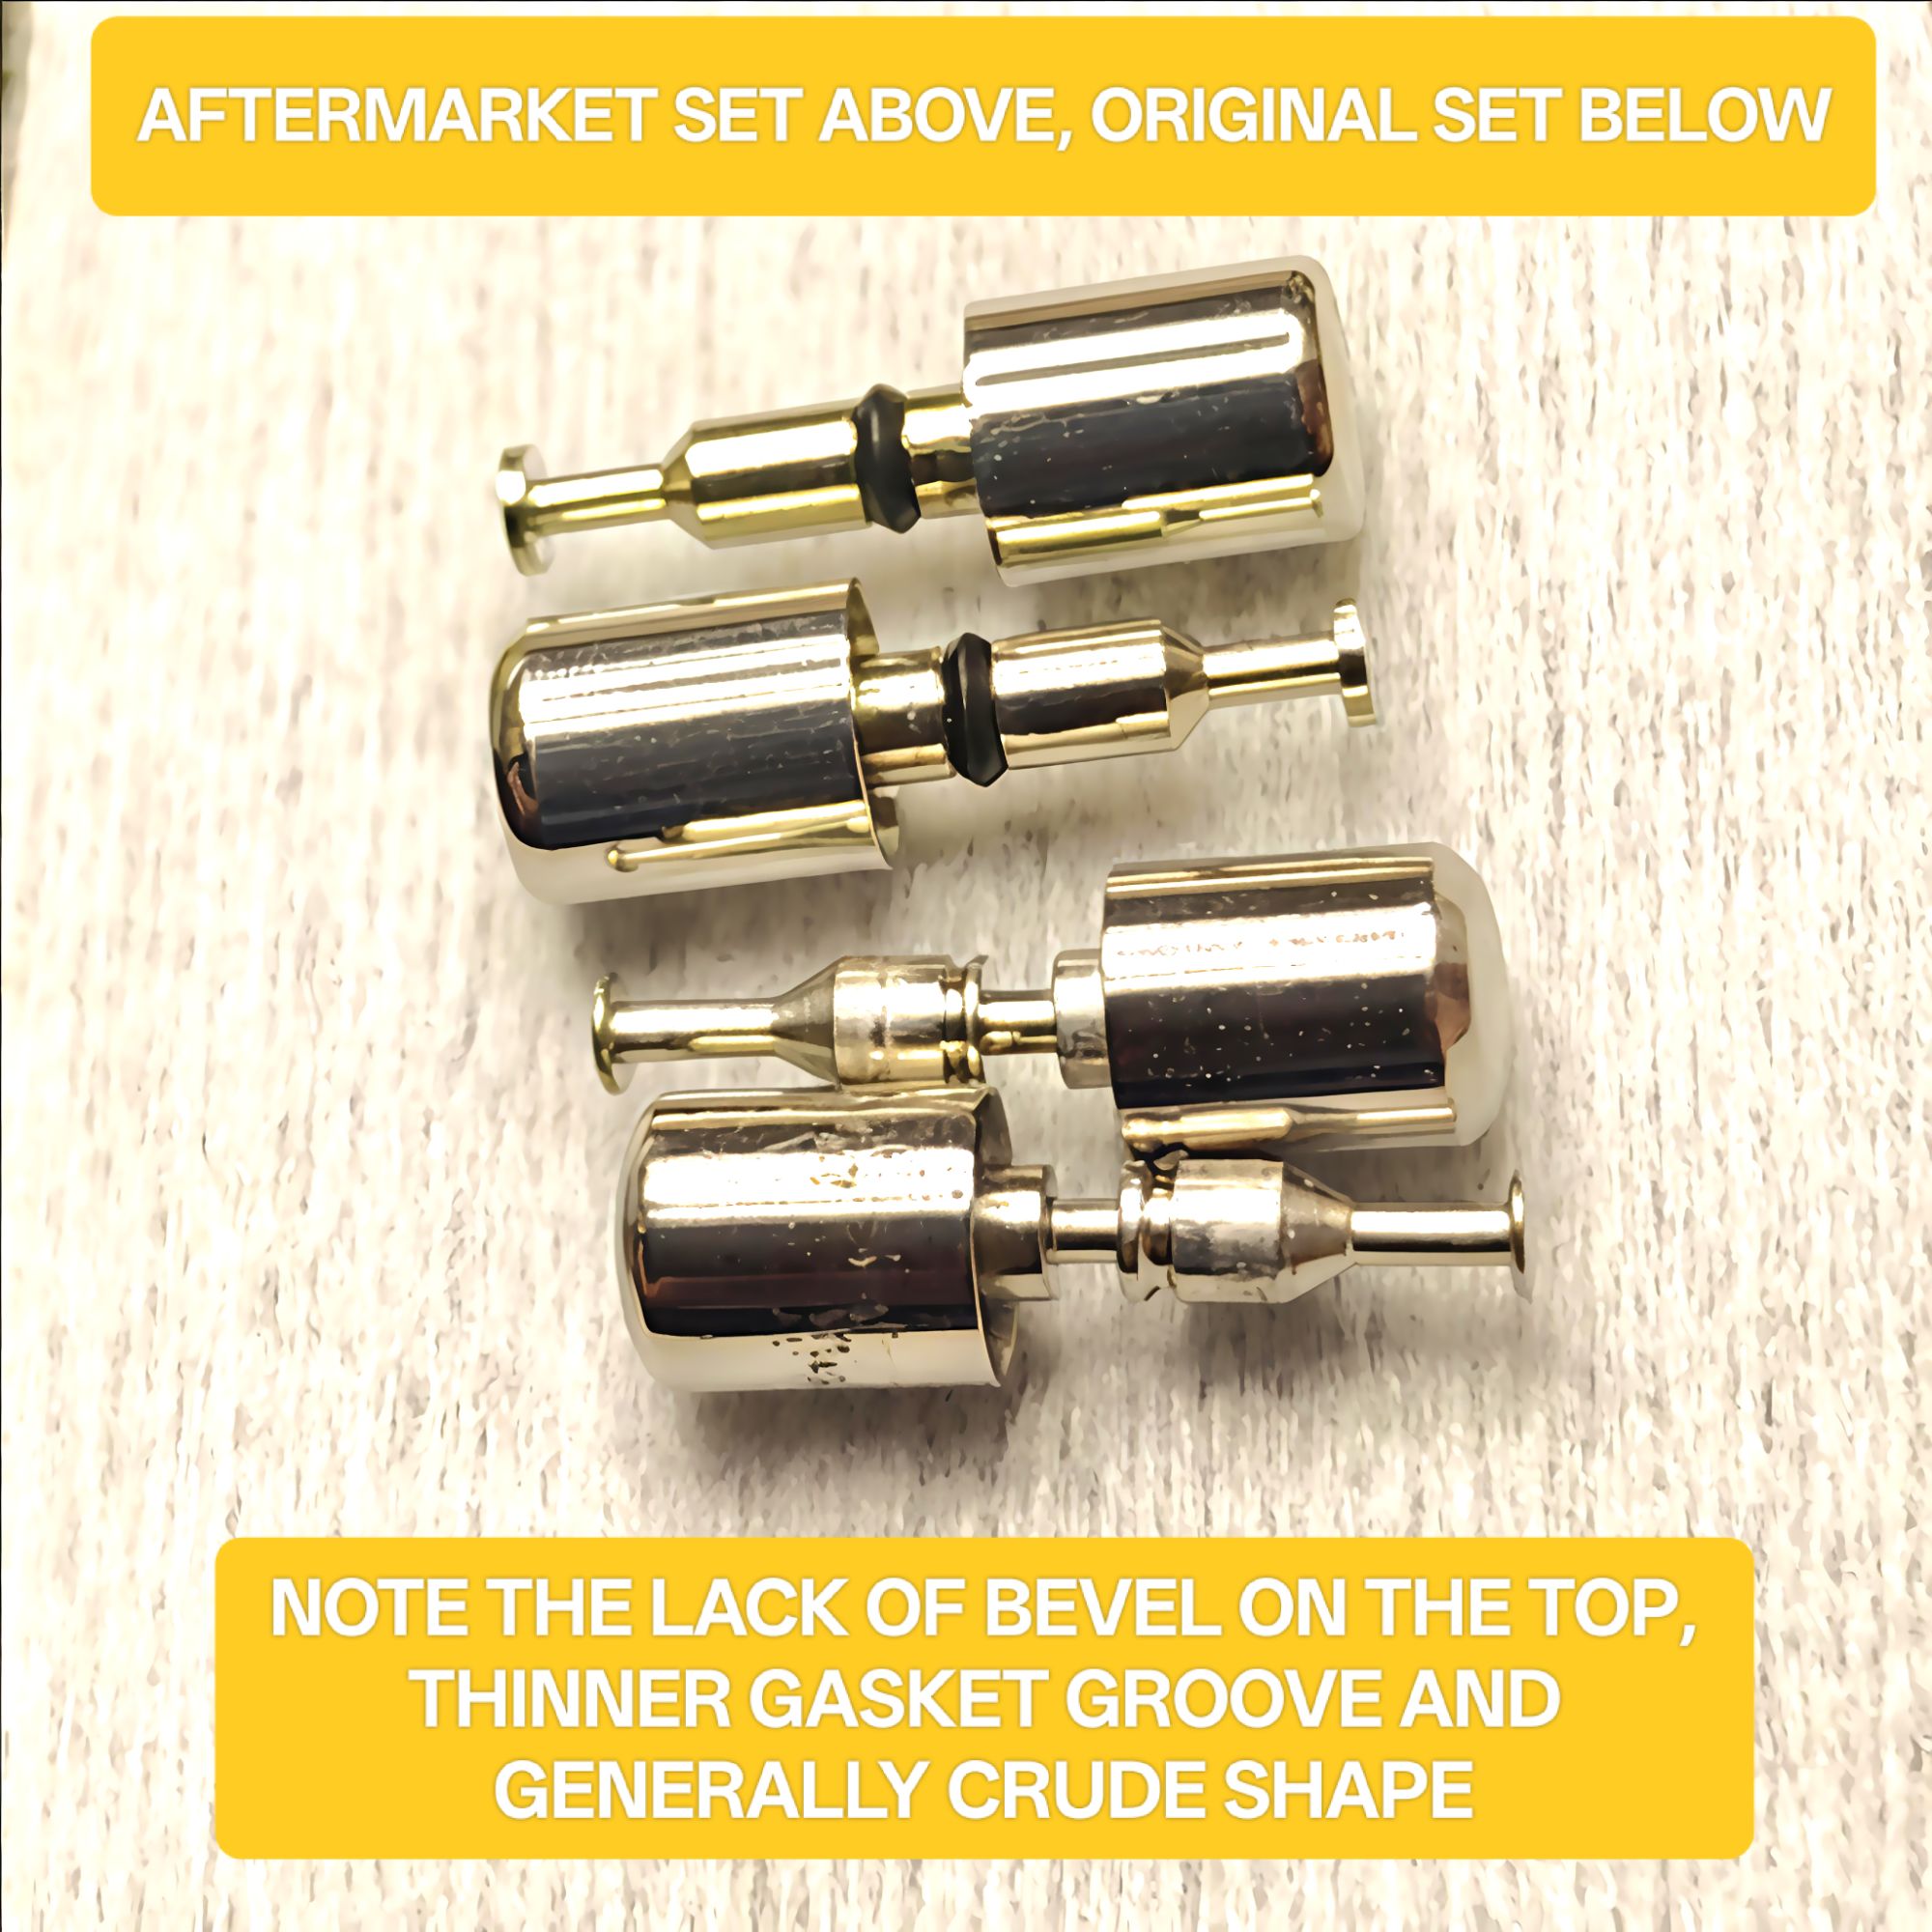
Part III – Aftermarket & Original Buttons – The Differences
Modern reproductions of the buttons are cheap and plentiful. Good enough for use, there are nevertheless noticeable differences from the original ones. Succinctly and with images for clarity, they are:
- Lack of a bevel at the top. The aftermarket ones are simply rounded.
- The groove for the DJ0060B gasket is not as wide as the original; presumably to grip the generic narrow gaskets better.
- Build quality is not as refined as the original ones with crude grooves and shape. The steel probably differs as well but I lack the expertise to comment on it.
- The round tips at the end which interface directly with the movement are quite thicker than the original ones.


Part IV – Buttons From the ‘PROOF’ years
compared with the later years
While taking the photographs and researching for this post, I have since observed a curious variance in the construction of the pushers. When comparing the design between the oldest watches having PROOF dial / PROOF caseback & the 6138A/6139A movement and those from the later resist series with the 6138B/6139B movement, the newer buttons have an extra groove or gap between the gasket groove and the tip of the button.
The older buttons do not have that extra groove and are thus of a ‘simpler’ and smoother design. What prompted the redesign to incorporate the extra groove or gap is a mystery and my best guess is that it may have something to do with the tooling and manufacturing process.
With the limited examples I had available with me, I have posted some images below and would welcome any information on this.

I hope this lengthy post is of some help in identifying buttons from a mixed bag and aid in maintaining this integral and important part of the chronograph mechanism, pushing our cherished vintage Seikos to run for another half-century!
4 responses to “On Pushers for the Seiko 6138 and 6139 Chronographs”
-
Hi
Clive here from the Retro FB group.
Good to read this interesting article about the different Seiko pushers. Love the info on making a spring bar tool, ingenious!
My Facebook account got hacked last year and I closed the email account and mobile number attached to it. Facebook have blocked my account. Have tried lots of times to re-open it or set a new one up, but get weird stuff happening that makes me think the hacker is sitting waiting …… paranoid or what!!
I hope you and your family are well? I must congratulate you on your very well written and put together articles.
I’m still bashing watches into shape and have even had an attempt at clock wrecking.
Messing with the timepieces has been a saviour for me through a hard patch of different illnesses and the stress of getting hacked!
Not looking for any sympathy…. it’s life and we have to go with the flow.
Look forward to reading more of your articles.
Keep ticking!
Clive.LikeLike
-
This is very well written!
LikeLike
-
Thank you!
LikeLike
-
-
Great work, thanks for doing this
LikeLike
Discover more from TheIndianSeikoSmith
Subscribe to get the latest posts sent to your email.

Leave a reply to theindianseikosmith Cancel reply